Secrets of planting celery seedlings
Content
Preparing celery seeds for sowing
Celery is typically grown by sowing seeds to produce seedlings. Celery is often grown in greenhouses or hothouses, sometimes on balconies and terraces. Seed trays and containers are used for this purpose. With the right approach, you can get early, juicy, fragrant greens, succulent, firm petioles, and voluminous roots.
Due to its biological peculiarity, which includes a long growing season in the first year, up to 180 days, celery is typically grown from seedlings. Celery seeds are prepared for seedlings in mid-March.
Because the seeds of this crop are small, dry, and slow to germinate, their high content of essential oils prevents them from swelling in the soil. They often fail to germinate even within three weeks, and if there's a lack of moisture, they produce very small shoots.
The most common, simple, but less effective method involves soaking the seeds in water for a couple of days. Afterward, the seeds are dried and sown in boxes or special containers.
To speed up the process of sprouting, it is recommended to germinate the seeds.The germination procedure is carried out as follows: the required number of seeds for planting are placed in a cloth bag and immersed in well-warm water for 20 minutes, then quickly lowered into cold water for also 20 minutes.
Then, the planting material is spread in a thin layer on a damp cloth and left to germinate in a warm place. When the first sprouts emerge, they are mixed with dry sand at a ratio of 1:1 and sown into the soil.
Along with these methods, there are methods for planting root and petiole celery seeds using an oxygen solution and growth stimulants.
The seeds are bubbled in oxygenated water for 24 hours using a micro-compressor for aquariums. Afterwards, they are treated with a 1% manganese solution for 1 hour, soaked in an epin solution (2 drops per 100 ml of water) for 20 hours, and then sown.
Compliance with this scheme and its sequence is an essential guarantee of a successful harvest.
Video: Seed Preparation
From this video you will learn how to properly prepare seeds.
Let's start landing
Since celery is resistant to light spring frosts, its seedlings are grown in a greenhouse. Before planting the seedlings, prepare seeding containers with a thin layer of fine straw at the bottom. This will maintain an optimal temperature in the root zone and absorb excess moisture.
The next layer in the container will be a loose mixture consisting of peat (3 parts), turf soil (1 part), and humus and sand (1 part each). Also, for each bucket of soil, add 150 grams of wood ash and a small amount of urea.
Seeds with a few sprouts are dried, mixed with sand, and sown in trays with moist soil. They are planted in rows, buried 0.5-1 cm deep, with a distance of 7-8 cm between rows.
An effective sowing method is to lay the planting material on top of the soil in rows, then sprinkle it with a thin layer of fine sand. This will ensure free access of oxygen and successful germination.
Place the box in a warm location, covering it with clear plastic. The period from sowing to the first shoots appears takes up to two weeks. Water with a hand-held sprayer using warm water; heavy watering with cold water will cause blackleg.
Whatever method you choose for growing seedlings, keep them in bright, warm areas until the first shoots emerge. Once sprouts are visible, remove the plastic wrap and move the container to a well-lit, comfortable location. During this time, the plants need to be treated with disease control products.
Sometimes, seedlings may grow too densely, in which case they need to be thinned out, as this will interfere with each other's development and vigorous growth, resulting in weak and wilted plants. The container where the plant is growing should be kept moderately moist at all times.
For the first month and a half, celery planted in a special container grows slowly. A month after sowing, the seedlings are thinned, leaving 5 cm between plants in a row, or they are transplanted into peat pots, seed boxes, or into the soil of a hotbed or greenhouse.
When transplanting, seedlings are planted deep into the soil, covering the roots. When transplanting seedlings into a greenhouse, they are spaced 5-6 cm apart, with row spacings of 5-6 cm. This is because after planting, numerous lateral roots form in the celery root system.
When picking, it is necessary not to damage the main root, as this will lead to deformation of the root crop formation in the future.
The next step after planting is watering. The plants are watered and then covered with damp paper for two days. If the leaves on the shoots turn light green, fertilize with urea (1 teaspoon per bucket of water). The ideal temperature for growth is 14-17°C (51-53°F) during the day and 10-12°C (50-53°F) at night. This temperature is crucial for root formation; lower temperatures can cause the plants to form flower stalks, which will significantly reduce the quality and yield of the celery root.
Subsequent care of seedlings consists of loosening the soil between rows, irrigation, ventilation, and fertilizing.
Two to three days before planting seedlings in open ground, they need to be hardened off by taking them out of the hotbed or greenhouse for the first time during the day and leaving them there for the entire day, then hiding them overnight, and then overnight to allow them to adapt to the climate. They are transplanted into the plots when the seedlings have reached the 4-5 leaf stage, approximately one and a half to two months. Two hours before transplanting the shoots into the plot, they are thoroughly watered.
We plant the seedlings in the garden bed
Planting celery begins with preparing the site where it will grow. This crop requires light, well-drained, airy, enriched, and fertile soil.
A bed in an open, well-lit area is considered ideal. It's also important to consider the site's history, including what crops have grown there in previous seasons. Beans, peas, asparagus, all types of cabbage, and cucumbers are considered favorable, but celery should not be planted after potatoes, carrots, and almost all greens.
The planting site is prepared in the fall: the soil is dug over and fertilized with humus or compost. In the spring, the soil is loosened and mineral fertilizer is applied at a rate of 40 grams per square meter.
Before planting, add a handful of humus and ash to each hole, mixing it with the soil. Then, plant each seedling deeper, firming the soil around the shoots and watering the planting site. Afterwards, shade the shoots from the scorching sun.
The best time to plant seedlings in the soil is mid-May, or even earlier in early spring. It's important to keep in mind that earlier plantings will yield a higher, higher-quality celery root harvest than those planted later.
Good celery seedlings are considered to be plants 12-15 cm tall, with 4-5 leaves and developed roots. If the seedlings are weak or overgrown, the harvest is unlikely to be of high quality.
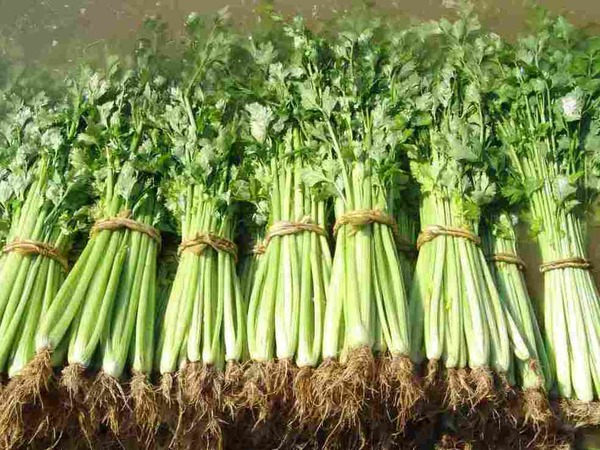
Seedlings are planted in the plot, keeping the required distance of 40-50 cm within a row. For stem and leaf varieties of this crop, they are spaced 15-20 cm apart, with a distance of 30 cm between rows.
Celery will go well with garlic, potatoes, and onions.
Caring for root vegetables
Caring for celery varies slightly depending on whether you want to grow root or leaf celery.
To prevent the evaporation of moisture, which is so valuable for a young seedling, the area around the planting is mulched.
Celery requires constant moisture, watering at a rate of 20-25 liters of water per square meter per week. Avoid allowing the soil to dry out. During drought, water daily. The soil under the celery should always be moist.
Until the foliage above the bed closes, the space between the rows should be regularly loosened.
This crop also requires fertilizing, which will ensure a generous harvest.
Top dressing is carried out four times per season.
The first is during the seedling period. The second is a week after planting (water with herbal infusions). The third is two weeks later, when the plants are fed with a liquid mullein infusion. The fourth, at the end of July, is when superphosphate is applied to the area at a rate of 30 g per m².
A month before harvesting celery, you need to do high hilling, which will whiten the stalks, reduce their bitterness and the concentration of aromatic substances.
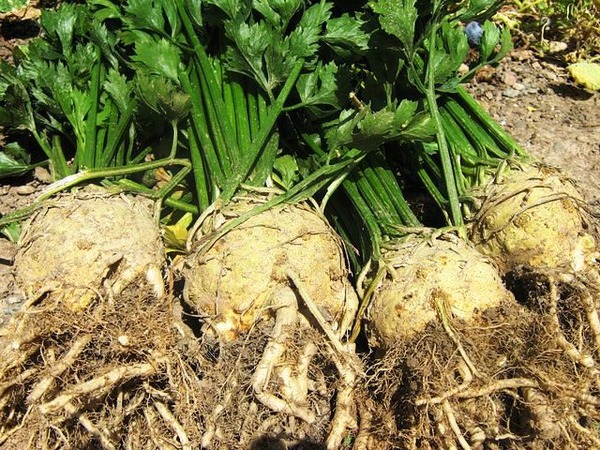
To harvest the root vegetable, in midsummer, remove the top of the plant from the soil, trim the lateral roots, and press the leaves to the ground. This will ensure the root vegetable develops a round shape and increases its weight.
When harvesting, you can leave the celery leaves and use them for winter vegetation: dig up the plants with a piece of soil before frost and plant them in a suitable container.
The harvest, following these recommendations, can be collected in late autumn, but it's important to do so before the first frost. To make it easier to remove the root vegetables from the soil, soak them in water beforehand.
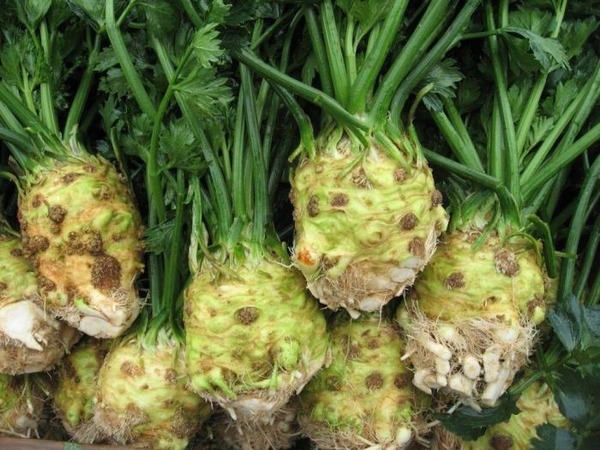
When harvesting the fruit, keep in mind that the skin is thin and delicate, try not to damage it.
Next year, after celery, it will be favorable to grow onions, garlic, potatoes, tomatoes, beans, peas, and asparagus in the area.
Video "Planting Seeds"
This video will show you how to properly plant seeds in open ground.