How to grow dill on a windowsill
Content
Features of growing dill
Many people think growing dill on a windowsill is a simple and easy task. However, harvesting this aromatic herb requires effort and knowledge of all the intricacies of growing it at home. Only then can you obtain a fresh source of vitamins and a wonderful seasoning for your culinary masterpieces.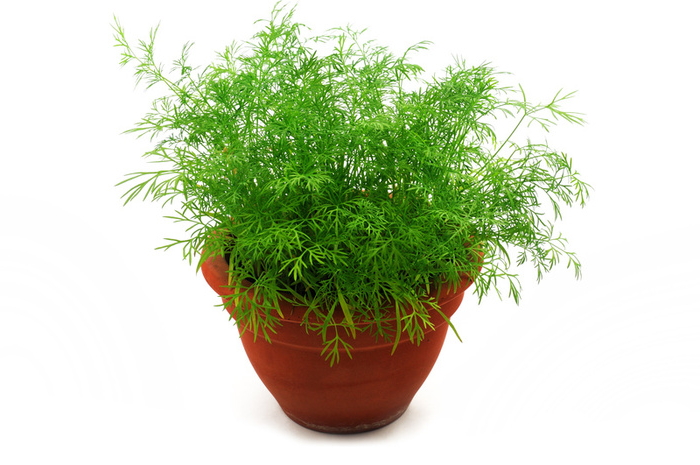
Dill, like any crop, has its own unique characteristics. However, growing it on a windowsill is only possible in winter, using the necessary agricultural techniques and armed to the teeth with all the necessary equipment and materials. The success of the entire project depends on the following factors:
- correct selection of planting material (seeds);
- sowing according to all the rules;
- maintaining care for plantings throughout their entire growth period.
Incorrect actions at each of the three stages listed above can lead to a negative outcome of the entire undertaking. In addition, it's important to know the key characteristics and requirements of dill. These include the following:
- This is a light-loving plant. Therefore, the best place to grow dill in an apartment or house is a well-lit, south-facing windowsill;
- In winter, the plant will need additional lighting. For additional illumination, you can install fluorescent lamps approximately 50 cm from the planting container. In winter, the lighting should be turned on for 5 hours in the morning. In total, dill needs 15 hours of light per day.
- creating the necessary conditions for plants throughout their growth;
- timely and frequent watering.

Knowing the peculiarities of growing this crop, you can quite successfully plant dill at home.
Selection and preparation of planting material
To grow dill on a windowsill, you will need the following materials:
- a package of seeds of the plant variety you like;
- fertile garden soil;
- soil suitable for growing indoor plants;
- Containers in which the seeds will be sown. A variety of containers and pots are ideal for this purpose;
- lamps for additional lighting of plantings in winter (fluorescent light sources);
- complex mineral fertilizers.

When growing dill at home, the key to success is choosing the right variety. The same applies to parsley, which is just as popular as dill for winter home growing. The seeds of this crop are visually indistinguishable. Therefore, the primary factor in choosing planting material and variety is ripening time. This parameter is used to classify the varieties of this herb. Like other crops, dill comes in the following varieties:
- early;
- average;
- late.
Experienced gardeners recommend growing early-ripening varieties such as Gribovsky, Grenadier, and Richelieu in an apartment or house. However, late-ripening varieties are also useful. To ensure you always have fresh greens on your table, you can sow seeds of early, mid-season, and late-ripening varieties in different planting containers.
When choosing seeds for planting, it's worth considering the Gribovsky variety. This early-ripening variety is easy to care for. To obtain a good harvest, simply sow the seeds and water the plants periodically. Furthermore, it has excellent temperature tolerance and disease resistance. Furthermore, the variety produces a fairly high yield, and its greens have a distinct aroma. Besides the Gribovsky variety, Richelieu and Grenadier, as well as the late-ripening Kibrai, have proven themselves excellent for indoor cultivation.
When choosing a seed variety for growing dill on a windowsill, remember that there's no perfect solution. However, many experienced gardeners prefer to grow late-ripening varieties at home, which form dense, leafy bushes on the windowsill, constantly sending up new shoots in the axils.
Once the seeds have been selected, they are prepared for sowing. This must include soaking the seed material and subsequent disinfection. For this crop, seed preparation is as follows:
- they are soaked in warm water for 5-8 hours;
- After this, the water is drained and the seeds are placed in a weak pink solution of potassium permanganate. The solution is prepared at room temperature;
- Disinfection of planting material in potassium permanganate lasts 2-3 hours.

It's worth noting that any seed that doesn't sink to the bottom during preparation is discarded. It's not suitable for sowing, as it's considered low-quality. After separating the good seeds, they need to be thoroughly dried before planting. To do this, place the seed on a cotton pad or piece of cloth.
While soaking, disinfecting, and drying the seeds, it's important to prepare everything necessary for planting. To ensure an excellent harvest, you'll need:
- A planting container. Containers are best for dill, but flower pots and wooden crates are also suitable. The choice of container should depend on the planned harvest volume. Remember, no matter what container you choose, it should have drainage holes in the bottom.
- Soil. The necessary substrate for growing dill can be purchased at a flower shop or made at home. In the latter case, vermicompost is a mandatory component of such a mixture. The soil substrate for dill should contain 2 parts coconut fiber and 1 part vermicompost;
- Drainage. Broken brick or expanded clay should be used as drainage material, which should be placed at the bottom of the container.

To plant dill indoors, place drainage at the bottom of the chosen container and fill it with substrate. After this, you can begin sowing the seeds, which have been pre-treated.
Video "Dill on the Windowsill"
This video discusses some tips for growing dill on a windowsill.
Sowing technology
When sowing seeds, remember that there's no specific planting pattern for this crop when grown on a windowsill. This plant can be grown in either rows or bunches. Therefore, you can sow the prepared seeds in any order you prefer.
Once the seeds are in the soil, they should be covered with soil, no more than 2 cm deep. Then, moisten the soil and cover it with plastic wrap. Alternatively, you can use cling film, which will create a greenhouse effect.
After sowing, place the container on the sunniest windowsill in your house or apartment. The optimal temperature for germination is 18 degrees Celsius (64 degrees Fahrenheit). Keep the container at this temperature until the first shoots appear. Under the right conditions, dill usually sprouts within a week of sowing. 100% germination is observed within 10-12 days. Remove the plastic wrap immediately after the first shoots appear.
Care
Once the first shoots appear, dill requires specific care to ensure tall, bushy plants. The following care is recommended for emerging dill:
- For the first 7 days after germination, lower the room temperature at night. This can be achieved by simply opening a window or moving the containers with the seedlings to a glassed-in balcony. This will prevent the plants from stretching excessively;
- The plantings need to be watered regularly. Watering is especially important for newly emerging sprouts;

- Fertilizer is added to the containers every two weeks. For this purpose, mineral fertilizers should be added;
- The optimal temperature for dill is 18 degrees Celsius. Pots with plants can be moved to a glassed-in balcony. Here, the seedlings will thrive even at temperatures as low as 8 degrees Celsius. If temperatures rise above 20 degrees Celsius, it's recommended to increase the light. Otherwise, the bushes will become elongated, light-colored, and wilted.
- spraying of crops;
- Additional lighting for dill. This plant requires at least 15 hours of light. Lighting is particularly important during the winter. If the crop is grown in the summer, natural light levels will be sufficient, and additional lighting will not be necessary.

In general, caring for dill at home in cold and warm seasons is virtually the same. The only thing you'll need to do in winter is provide additional lighting. Fluorescent lamps are ideal for this purpose. The lamps should be placed 50-60 cm above the dill plants.
Since the containers will be placed on a windowsill, supplemental lighting should be turned on for a maximum of 5-6 hours. This assumes, of course, that the plant is grown on a south-facing, well-lit windowsill. If the dill pot is located in the back of the house or apartment, supplemental lighting should be on for 15 hours or more. Therefore, to avoid breaking the bank on electricity bills, it's best to place the container with the plants on the brightest windowsill. You can also reduce energy consumption by using more modern and energy-efficient light sources (such as LED strips and bulbs). By choosing the right LED lighting fixture, you can achieve the same results as fluorescent lamps. However, your electricity bills will be significantly lower.
To encourage the sprouts to grow upward and prevent them from leaning, rotate the container periodically. Rotate the pot 180 degrees. This procedure should be performed at least once a day.
Growing dill indoors will require more effort depending on the time of year you choose. In winter, you'll need to invest in additional lighting, but in summer, the crop can be grown outdoors. Therefore, winter is the most suitable time to plant dill indoors. However, to ensure a good harvest during the cold season, you need to constantly monitor your plants, watering and fertilizing them regularly. Therefore, don't assume that growing this crop, especially in winter, is simple and easy.
Video: "Garden on the Windowsill"
In this video, the author shares his experience growing dill on a balcony.