Features of growing and caring for beets in open ground
Content
Selecting a variety
There are three types of beets: table, sugar, and fodder. Table, leaf, and root beets can differ in ripening time, fruit shape, and flesh color. You can grow any type of beet in your garden; it's just important to know the specific characteristics of the variety.
Early-ripening beets are planted for summer consumption; they fully ripen two to three months after sowing, but are eaten much earlier. Mid-late and late-ripening varieties, which mature in three to five months, are best grown for long-term storage. Beets harvested after full ripening are typically stored throughout the winter, but not all regions can grow beets for such a long time. Therefore, it's best to choose a variety based on its growing time and the duration of the warm season in your area.
Early varieties such as 'Kholodostoikaya', 'Egyptskaya', 'Krasny Shar', 'Bordeaux 237', and 'Nobol' take 60 to 90 days to mature from sowing. Young roots are ready to eat when their diameter exceeds 1.5 cm. This is when the dense seedlings are thinned out, and the roots and leaves are ready to eat. Young, succulent leaves are often used along with other garden greens in salads, okroshka, or soups.
Mid-early varieties mature in 90 to 130 days. Beets such as "Detroit," "Mulatka," "Bona," and "Bogema" are more resilient than early varieties. They are unaffected by temperature fluctuations, tolerate drought, and are less susceptible to disease. Once fully ripened, they can be stored for a long time. These varieties are chosen for winter consumption in regions where September brings severe cold, where later varieties simply won't ripen.
Late-ripening beets should grow for 130 to 150 days from sowing. Of course, five months of warm weather isn't always possible, so these varieties aren't grown in the north. Among the most popular late-ripening varieties, gardeners choose "Cylindra" and "Renova."
Video "Varieties"
This video will tell you about the best beet varieties for growing.
Selecting a location and preparing beds
Beets, which are easy to plant and care for outdoors, prefer open, sunny spots. Therefore, they need a bed that's not shaded, allowing them to receive maximum sunlight throughout the day. Beets should be planted in a new location each year; otherwise, you might not see a harvest at all, and you'll spend the entire season battling diseases and pests. It's not recommended to plant them after any type of cabbage, radishes, rapeseed, or carrots. Experts disagree about potatoes, but this vegetable grows best in areas previously occupied by tomatoes, cucumbers, peppers, onions, eggplants, legumes, or grains. As you can see, the choice is wide enough to allow for a change of location each year—a crucial factor for trouble-free growing.
Beets don't like heavy, acidic soils or stagnant water, but they can survive even there. However, if grown in light, breathable soils, even slightly alkaline, and provided they receive the required amount of moisture regularly, they will certainly produce tasty, juicy, and slightly crunchy roots. It's best to choose (or create) a plot with fertile, sandy or loamy, non-acidic soil; these conditions will guarantee a good harvest. Gardeners often plant beet borders along paths in beds of cabbage or carrots. This proximity will provide the vegetables with the necessary nutrition and water, as their needs largely overlap.
Sowing is most often done in the spring, when the soil has already warmed up to 10 degrees Celsius, but the site is prepared in the fall. After harvesting, the bed is completely cleared of plant debris and dug to a depth of a spade, removing the roots of perennial weeds along the way. If the soil is even slightly acidic, the pH should be adjusted by adding lime, dolomite flour, or at least wood ash. In the fall, the soil is fertilized—be sure to add humus or compost, as well as complex mineral fertilizers containing, in addition to the essential nitrogen, phosphorus, and potassium, some iron, boron, copper, magnesium, molybdenum, and manganese.
However, beets are sensitive to overfertilization; overly generous mineral fertilizers can lead to nitrate accumulation, causing the roots to develop voids or cracks. Don't fertilize beets with fresh manure; only compost that's been aged for at least two years.
The prepared soil is then watered and left to rest and absorb the fertilizer until spring. Fall sowing is done before winter, no earlier than November, to prevent the seeds from sprouting and to preserve them until warmer weather arrives, while also being hardened by frost.
They will sprout earlier than spring sowings and produce stronger shoots, unless they sprout during an unplanned thaw, which will inevitably lead to their subsequent freezing.
Seed preparation and planting procedure
Beet seeds are unique: several are hidden under a single seed coat. Up to five sprouts can form during germination, which is why they are placed in the soil, one per nest. These unusually large drupes should be sandy-brown or slightly greenish in color. If store-bought seeds are bright pink or bluish-green, this means they have been treated with fungicides and growth stimulants. They require no further preparation for sowing; they are placed directly into the soil while dry.
Untreated seeds need to be prepared for sowing. To do this, first soak them in warm water. Discard any that float to the surface. Wrap any remaining seeds in cheesecloth or collect them in a linen bag and soak them in a growth stimulant solution (Epin, Zircon) for the time indicated on the package. You can also prepare this solution yourself. For each liter of warm water, mix 2 grams of boric acid, 4 grams of nitroammophoska, 5 grams of superphosphate, 1 teaspoon of baking soda, and a small amount of wood ash. Soak the seeds in this solution for half an hour. Then, keep the seeds in a warm, humid environment for another 24 hours.
The hatched seeds are placed in prepared furrows in the bed, spaced about 10 cm apart. Furrows are easily made with the end of a board: place the board sideways on the prepared bed and press gently, deepening it to a depth of two centimeters. Then, step back 20-30 cm and make the next furrow. This is very convenient: the bottom becomes even and dense, the rows become parallel, and the distances between rows become equal. They are lightly watered with a watering can just before sowing.
The seeds are covered with soil, watered, and then mulched a couple of centimeters with peat or compost. Sowing occurs when the air and soil temperature has reached at least 10 degrees Celsius. If sown earlier, the seedlings may appear slightly later, but such plants do not form roots; they usually grow large leaves and quickly produce flower stalks.
In regions with short summers, beets are best grown using seedlings. They are planted in the garden bed when the soil temperature is at least 10 degrees Celsius. Before then, they are germinated under plastic or indoors. If the seeds were sown in trays, when the leaves appear, they are pricked out into individual cups or thinned a couple of times before planting in the garden bed, and the removed seedlings are transplanted to another location. The seedlings are planted in their permanent location after three leaves appear. It's best to simply move the seedlings along with the root ball, so it's best if they were already growing in individual cups. This transfer, along with the original soil, reduces stress and speeds up the adaptation process in the new location.
Outdoor care
After a couple of leaves appear, care for the plants as usual: weed, water, loosen the soil, fertilize, and protect from pests and diseases. From sowing until the leaves close, the beet bed needs to be constantly weeded—weeds not only rob the vegetables of nutrients but also promote various diseases. Once the beet leaves close above ground, weeds practically no longer grow beneath them.
For uniform development, root crops must receive a sufficient amount of moisture, so plants should be watered regularly, preferably using settled, sun-warmed water. Young plants are usually watered once a week in the evening, and the soil around them should be loosened in the morning to prevent a crust from forming. Mature plants need less frequent watering, but it all depends on the weather: hot, dry weather requires more frequent watering, while rain or cloudy weather postpones watering. If in doubt, you can always test the soil's dryness by hand to determine whether watering is necessary. To reduce watering and loosening the soil, you can mulch the bed with peat, hay, or grass clippings.
Initially, plants actively consume nitrogen, which they need for growth, but later, as root formation occurs, they require more potassium, phosphorus, and boron. Therefore, after the leaves appear, the bed can be watered with a solution of mullein or bird droppings, but dilute them eightfold (for manure) or twelvefold (for litter). Some water with nettle infusion or urea. Beets respond well to foliar feeding; in summer, they are watered with a boric acid solution from a watering can on the leaves, using 2 grams of boric acid dissolved in 10 liters of water. In summer, they are watered on the leaves with salt water, dissolving 1 tablespoon in 10 liters of water. Gardeners growing vegetables in poor soils fertilize them every two to three weeks. However, experts warn that excess fertilizer can cause the roots to crack and form hollows. Moreover, beets tend to accumulate nitrates, which we then consume, causing harm. So any fertilizing should be done with careful consideration.
Regardless, the closer autumn gets, the less frequently you need to water and fertilize your plants. Two to three weeks before harvest, watering is stopped entirely. This is especially true for late-ripening varieties intended for long-term storage. Early-ripening beets are watered as needed and pulled when needed.
Beets aren't susceptible to many diseases. A boron deficiency can lead to beet leaf spot. Downy mildew can devastate the crop. At the first signs (leaf curling, purple-tinted coating) before root formation, treatment with copper-containing preparations or special fungicides can be effective. Overwatering and stagnant water in heavy soil can lead to root rot. Attacks by beet flies, leaf miners, cutworms, beet aphids, and flea beetles are also possible. An infusion of onion peels can help prevent these. Dusting the plants with wood ash and tobacco dust is a good preventative measure.
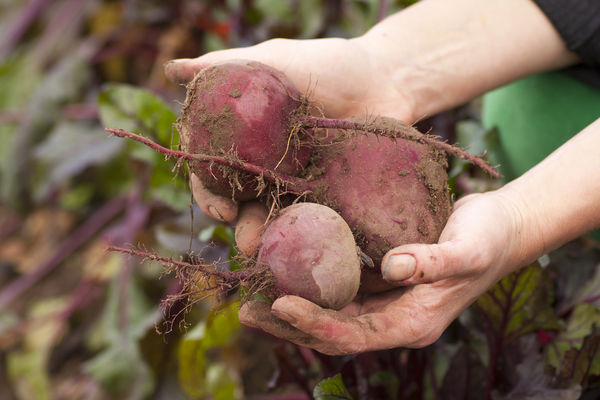
Harvesting and storage
Early beets are picked when the roots have grown more than 6 cm in diameter, but they can be eaten earlier. Late varieties, intended for winter storage, are harvested when the leaves turn yellow, dry, and fall to the ground. If the leaves begin to dry, the harvest should be picked within a week.
On a dry, sunny day, the beets are lifted with a pitchfork, removed, and left to dry in the garden bed. They are then cut or plucked by hand (this method is considered less damaging), leaving at least 2.5 cm of stalks. They are shaken free of any remaining soil, and sorted.
Beets that will be stored for a long time are dried outdoors under a roof or in a ventilated area. They are then transferred to a storage area where they will be kept at 90% humidity and a temperature of 0 to 2 degrees Celsius. The roots are stored in wooden or even plastic boxes, dusted with chalk or simply sprinkled with sand for better preservation.
Video "Growing and Care"
From this video you will learn all the secrets of fruitful beet growing.