Stuttgarter onion: characteristics, cultivation and care
Content
Description
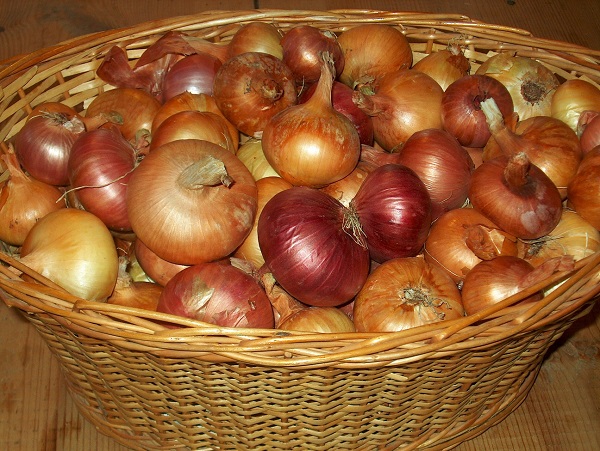
The Stuttgarter onion has long been a favorite among gardeners for its mild flavor, ease of care, and consistent yields. It can be planted from seeds and sets, in spring and fall, for both green and bulb onions. This early variety produces a harvest in 70 days when planted from sets, while if sown from seeds, harvesting takes three and a half months.
The Stuttgarter onion grows well in all soils, as long as it's not acidic. However, if you want a bountiful harvest, you should grow it in chernozem or loamy soils rich in humus. The bulb averages 150g, but can reach up to 240g, with winter onions being particularly large. The bulb is round, flattened at the top and bottom, and covered with brownish-yellow scales. It has a pleasant, mild flavor, making it suitable for use in salads. However, it's versatile in its uses—it can be eaten fresh, canned, dried, or frozen.
Video "Description"
From the video you will learn a lot of interesting things about the Stuttgarter onion variety.
Planting by seeds
Stuttgarter onions are best planted in beds previously occupied by potatoes, cabbage, cucumbers, tomatoes, and legumes. Use fresh seeds; when purchasing from the store, it's best to choose those with a shelf life that expires not this year, but at least next year.  They need to be warmed up by holding them near a hot radiator, soaked in warm water for several hours (some experts say 24 hours), and you can add potassium permanganate to it for disinfection.
The soil is prepared in advance, taking into account its characteristics: compost or humus is added to depleted soil, and acidic soil is corrected with lime, dolomite flour, or at least wood ash, which will be an excellent fertilizer for plants.
If the bed was previously used for cabbage, and the soil was fertilized, then this will be sufficient for onions. It's easiest to prepare the bed in the fall, even if you plan to sow in the spring. In the spring, you can simply loosen the soil just before sowing, making furrows 10 cm apart. The seeds are placed no deeper than 2 cm, with 1-1.5 cm gaps between them. Cover the seeds with soil and compact it lightly to ensure there are no air pockets around the seeds.
In spring, sowing should not begin until April, when the soil has warmed to 10 degrees Celsius. The bed can even be covered with plastic at night to speed up germination. After autumn sowing, the bed is mulched with peat and humus mixed with loose soil.
Planting onion sets
Stuttgarter Riesen onion sets are also planted in spring or fall. Small seeds, less than a centimeter thick, are planted before winter—they likely won't survive until spring. However, as a winter crop, they can produce excellent turnips by early summer, and in early spring, the first, most coveted greens. The bed for this variety is prepared after the previous crop has been harvested: dug over, cleared of grass, roots, and any debris, fertilized if necessary, and lime or wood ash added.  Plant onions a month before winter to allow them to take root before the frost sets in. Autumn plantings should be mulched or at least covered with hay, dry leaves, or spruce branches to prevent them from freezing before the snow sets in.
Some brave gardeners plant the onion sets in August or September, water them, and before winter arrives, they manage to grow several leaves, with which they disappear under the snow. These green-feathered onions must be covered with a special material (lutrasil, spunbond) or a very thick layer of leaves or spruce branches. They will survive a light frost, snow will protect them from a stronger one, and as soon as the ground thaws, the onions will continue to grow and delight the owners with early greens, and then the very first bulbs.
Stuttgart Riesen onion sets can be planted in rotation in the spring: the smallest ones are planted as soon as the ground thaws, and the larger ones after the soil warms to 15 degrees Celsius. Small sets do not bolt, but if large ones are planted in cold soil, they will bolt immediately, so there's no rush.
The planting material is prepared to accelerate germination. To do this, the onion sets are heated for at least 8 hours (you can simply place them on a radiator), then soaked in warm water for 24 hours. A small amount of potassium permanganate is added to the water for disinfection and aloe juice to stimulate growth. The onions are removed from the water, laid out on burlap (or plastic film), covered with a lid, and then planted in the prepared bed. The onions are planted no more than 2 cm deep, spaced in rows 20-25 cm apart, leaving 10-15 cm between each bulb.
If they want to grow a stem, they take turnips or onion sets that weren't suitable for planting and lightly plant them in the soil, side by side, with almost no space between them. They don't cover them with soil, but they do cover them with plastic to speed up the forcing process. Some gardeners cut off the top of the bulb or simply snip the outer scales to facilitate the sprout's emergence into the light.
Care and feeding
After two weeks, fertilize the plants with a solution of mullein or bird droppings. Diluting the solution with water is essential to avoid burning the onions; eightfold or more is recommended. Fresh manure should not be used as a fertilizer, as it will attract pests and cause the onions to grow crooked, causing the bulbs to split, all of which contribute to disease. It's better to use well-rotted manure, mullein infusion, or compost. Later, the plants will require mineral fertilizers rich in phosphorus and potassium. A month later, apply another fertilizer, diluting urea, superphosphate, and potassium salt with water. A third fertilizer is applied during the bulb formation stage, using a complex mineral fertilizer.
The plant's condition itself will indicate its needs. Pale, slow-growing leaves indicate a nitrogen deficiency. If the leaves are wrinkled and look old, it's clearly a potassium deficiency. A phosphorus deficiency will cause the leaf tips to turn black. If the onion appears healthy and growing well, there's no need to fertilize. Experts say it's better to underfeed than overfeed, as any excess will end up on the table.
Throughout the season, keep the bed clean, clear it of weeds, and gently loosen the soil to allow air to reach the roots, but avoid damaging the developing turnips, as this can lead to infection. Watering should also be adjusted according to the weather: if it's hot, water more frequently; loosen the soil after rain; and by early July (unless it's scorching hot), gradually reduce watering, and then stop completely two weeks before harvest.
This wonderful variety is not susceptible to pest or disease attacks, but just in case, it is better to plant a few dill bushes in the garden to repel insects.
Harvesting
Green leaves and young turnips are consumed throughout the summer, but the full harvest occurs when the bulbs are ripe. This is indicated by yellowing, drying, and lodging of the leaves, drying of the neck, and the characteristic coloring of the bulbs' outer scales. Leaving ripe onions in the ground is not recommended—they may begin growing again or rot after the next rain.

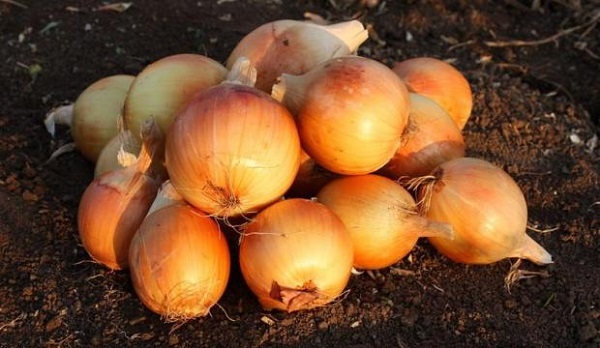
On a dry, sunny day, the onions are picked and left in the garden bed to dry, weather permitting. If it's damp outside, the harvest is dried under a canopy or in a ventilated area until the roots and leaves are completely dry. Only then can the onions be sorted, separating the harvest for eating, canning, and long-term storage.
Storage
Only fully ripe, healthy, and undamaged turnips are stored. Their roots and leaves are trimmed and then placed in boxes filled with sand. While the bulbs can tolerate subzero temperatures, it's best to store them at temperatures between 0°C and -3°C (32°F). However, sudden temperature fluctuations encourage condensation to form on the bulbs themselves, leading to rotting.
Under the right conditions, the harvest will remain undisturbed until spring. The onions are also stored in sand, but they need to be checked periodically, as exposure to moisture, temperature changes, or other fluctuations can cause them to sprout.
Video "The Subtleties of Planting"
This video will show you how to plant onion sets correctly.