Exhibition Onion: Growing and Care
Content
About the variety
The Exhibition onion differs from almost all its relatives in taste, weight, cultivation method, and even aroma. It is, without exaggeration, a giant onion variety. Its enormous size, along with its unusual and pleasant flavor, have made it quite popular among gardeners. However, not everyone can grow it, as this vegetable requires a rather difficult cultivation method. Therefore, many gardeners prefer the smaller, tastier, but easier-to-grow onion.

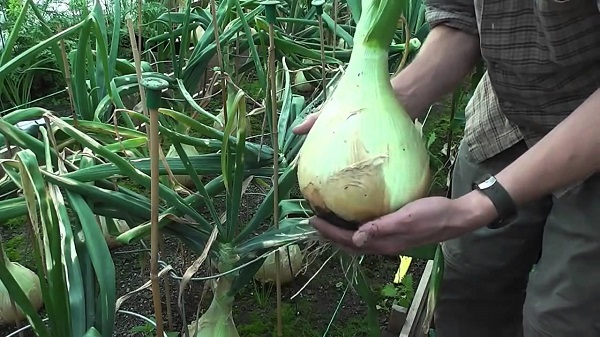
This variety was developed by Dutch breeders. Its main characteristic is its enormous size, often exceeding the average onion bulb. A single bulb can weigh between 500 and 800 grams. Some bulbs have been reported to weigh as much as a kilogram!
Besides its large size and weight, Exhibition stands out from other varieties with its flavor. Its flesh is devoid of bitterness and has a slightly sweet taste. Furthermore, cutting one won't make your eyes water. Because of this unique flavor, this onion can be eaten fresh or used in a variety of culinary creations.
Despite these impressive characteristics, this variety has two significant drawbacks: a difficult cultivation technique, which requires not only selecting good sets but also caring for the plant throughout the growing season, and poor storage. Even if the bulbs are stored properly (at 4°C), they will only last until the New Year.
How to properly grow this variety using sets and seeds will be discussed below. Here, we'll only discuss the main cultivation features of this variety, as well as its technical characteristics. If all agricultural recommendations are followed, the Exhibition variety can be grown for no more than 80 days. In regions with short summers, this plant should be grown exclusively from seedlings.
As we can see, in addition to its gigantic size and unusual flavor, this variety also has a short growing season. These are the characteristics and drawbacks for which this onion is known.
Video "Giant Onion Seedlings"
The video explains how to plant onion seedlings.
Growing using seedlings
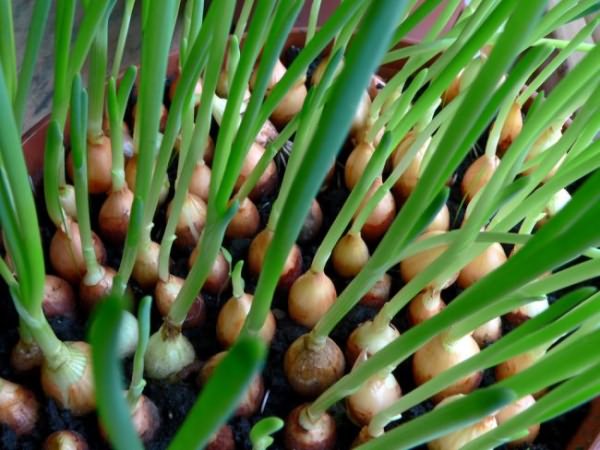
One method for growing the Exhibition variety is using seedlings. This method requires considerable time, effort, and attention, and if not followed correctly, will, in most cases, lead to a negative outcome. Despite the difficulty of propagation, only seedling cultivation, when all agricultural practices are followed correctly, will guarantee a bountiful and delicious harvest. This method ensures that the bulbs reach their maximum size.

Seedlings (sets) obtained this way tolerate transplantation into soil well, even without a root ball. As a result, the seedling method for growing Exhibition onions can be used in apartments in multi-story buildings. This method can be used without pricking out.
To obtain sets, seeds must be sown in early March. You may find information that sowing of planting material should be carried out at the end of February.
Before planting, it's always important to carefully select and prepare all selected seeds to maximize the success of your project. To prepare seeds for planting, follow these steps:
- Select the seeds. They should be healthy, without any signs of mold. It's also not recommended to use frozen seeds, as they will germinate poorly.
- Immerse the planting material in warm filtered water for several hours. To "wake up" the seeds, you can add a few drops of freshly squeezed aloe juice to the warm, filtered water.
- After removing the seeds from the water, they should be wrapped in gauze or cloth. They should remain in this position for 2-4 days;
- After this period, the planting material is disinfected. To do this, the seeds are immersed in a solution prepared from 1 g of potassium permanganate dissolved in 1 liter of water. The water temperature should be 38-40°C.

After completing all the above steps, you need to prepare the seeding area. Place the soil mixture into selected planting containers (for example, wooden boxes, small plastic cups, or long flower pots). It's made from turf soil, humus, and well-rotted cow manure. All these components should be mixed in a ratio of 10:9:1.
Once the planting containers are prepared, sow the seeds. Simply sow the seeds on top of the soil, then cover with soil. The top layer of soil should be approximately 1.5 cm thick. After this, water the seedlings generously and cover all the planting containers with plastic film. This creates greenhouse conditions, which accelerate the seed germination process.

The planting containers should be placed in a shaded area. They should remain there for 7-10 days. This is when the first shoots should appear on the soil surface. Once they have broken through the soil, remove the plastic wrap from the planting containers and place them in a well-lit spot. A south-facing windowsill is ideal.
To ensure the Exhibition onion produces good seedlings (sets), it's essential to provide the seedlings with proper care. This involves the following:
- Fertilizer should be applied daily. For this, use complex mineral fertilizers, 1 g of which is diluted in 2 liters of water;
- regular watering with warm water;
- the sets should grow at an air temperature of about + 20C;
- Once every few days, it is essential to ventilate the room where the onion seedlings are located.

These conditions should be maintained for two months. If the onion tops begin to droop during cultivation, they can be carefully trimmed. The onion sets should then have tops 10 cm long.
Remember that a couple of weeks before planting the seedlings outdoors, the planting containers need to be hardened off. It's recommended to take them out onto the balcony during the day. Hardening off will reduce stress on the seedlings when transplanting them outdoors. The seedlings are usually transplanted in early May. Planting is done as follows:
- Select a site. It should be well-lit, and the soil should be moist, loose, and well-drained.
- the soil acidity should be neutral or slightly acidic;
- Do not apply manure fertilizer before planting. Otherwise, the bulb's flesh will become loose.
- small diameter holes are made with a finger;
- The roots of the sets should be planted 2.5-3 cm deep.
To plant seedlings, use a 20x30 cm pattern. After planting, care for the plants as usual.
Growing from seeds
The Exhibition onion variety can also be grown from seed. This method is much simpler in terms of cultivation technology than seedlings. However, it does not guarantee a bountiful harvest.

This variety should be grown starting in early April. By this time, severe night frosts will no longer be observed. As with the seedling method, some preparation of the planting material is also required. In this case, prepare the seeds as follows:
- The seeds of this onion are very small, which complicates the process of preparing them. Therefore, to simplify the process, the seeds should be glued to a piece of toilet paper or a regular white napkin;
- Don't use superglue, but rather a specially prepared paste. To prepare it, dissolve 1 teaspoon of starch in cold water (150 ml). Heat the mixture until it reaches the consistency of cream. Cool the mixture and add AVA fertilizer. This will reduce the need for further fertilization, as this fertilizer doesn't wash out of the soil.
- Apply the prepared and cooled paste onto the paper base, drop by drop, spaced 5-7 cm apart. Then, place one seed in each drop and leave to dry. This will take about a day.
- Roll the dried papers into a roll and place them in plastic bags. They can be stored in this form until planting time. Seeds prepared this way will be much easier to plant outdoors. Also, after planting, there will be no need to thin the beds due to minor weeds.
Prepared seeds are planted in loose soil treated with Fitospriin. The seeds are placed in shallow trenches and covered with soil. After this, they require ample watering and proper care once the seedlings emerge.
Care

After planting the sets in open ground or the first shoots appear (growing from seed), Exhibition requires proper care. This isn't very complicated and involves the following steps:
- Moderate and regular watering. If watering is done correctly, the bulbs will be tasty and juicy. Watering should be stopped at the end of July. Otherwise, the bulbs will become too waterlogged and will not store well.
- to prevent the soil from drying out too quickly, the ground between plants can be covered with straw, peat or moss;
- After watering, the soil is loosened;
- Taking preventative measures to combat pests and pathogenic microflora. To protect crops from insects, onions can be grown next to carrots;
- Fertilizing. Here, nitrogen, potassium, phosphorus, and magnesium fertilizers should be used;
- Weeding should be done periodically to remove weeds. Weeding should be done very carefully to avoid damaging the vegetables being grown.
By following these simple recommendations, you can grow this variety of onion and get an excellent harvest.
Cleaning technology

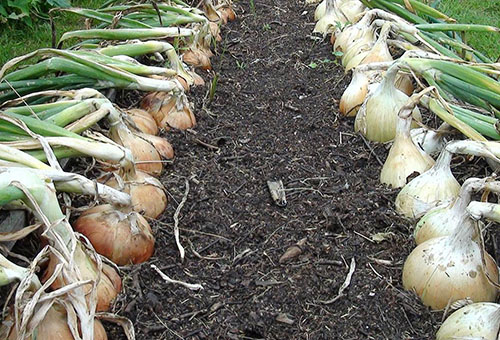
The Exhibition onion has a simple harvesting method, not much different from other varieties. The signal that it's time to harvest the long-awaited crop is the collapse of the greens. This is because the root system dies off simultaneously with the wilting of the greens. Therefore, it's crucial to harvest this vegetable on time, as otherwise the onion may re-root, which will reduce its shelf life.
Exhibition is usually harvested in dry, windy weather around mid-August. The bulbs are pulled or dug out of the ground and allowed to dry briefly in the sun. The harvest should then be thoroughly dried in a shed or attic for one month. When the necks of the onions become thin, the dry skins are removed and stored for the winter.
By following all the correct agricultural guidelines, from seeding to harvesting, you'll receive a high-quality product that will last the entire allotted shelf life. At the same time, the Exhibition onion variety will be tasty and nutritious.
Video: Growing Onions in the Garden
This video explains in detail how to grow giant onions.