Potato growing technology: methods and techniques
Content
Features of cultivation
This beloved crop grows best in a temperate climate. Choose sandy loam, medium loam, or peat soil for planting. Other soil types, as well as excessively shaded areas, are best avoided. The soil pH should not exceed 5 - 5.5.
Good predecessors include squash, legumes, cabbage, beets, cucumbers, peas, and green manure. It's recommended not to plant potatoes after nightshades. It's best to grow a crop in the same plot once every three years. In the fall, the soil should be cleared of weeds and dug deeply. You can add complex nitrogen-containing fertilizers or manure. In the spring, it's recommended to make ridges about 15 cm high. This allows the soil to warm up properly and provides moisture and air.
Video: "Potato Growing Technology"
This video will teach you about effective potato growing technology.
Growing technology
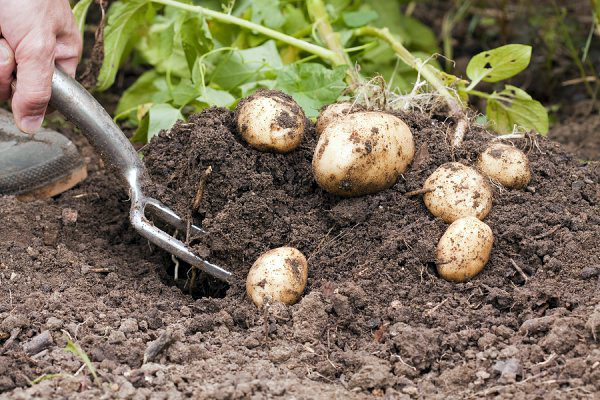
Potato varieties vary in maturity, ranging from early, mid-early, mid-season, mid-late, and late. Ripening times for this beloved vegetable range from 50 to 120 days. Experienced gardeners prefer to sow several varieties at once. Remember that early varieties don't store well. It's essential to follow the potato growing techniques known to experienced gardeners. Plant in April in soil warmed to at least 8°C (46°F). Allow the soil to dry thoroughly. Potatoes are planted at a depth of approximately 10 cm. The smaller the tubers, the shallower the depth.
When planting in clay soil, the depth should be no more than 8 cm; in arid regions, up to 20 cm. Planting is carried out according to the standard scheme. Leave a distance of 30 cm between plants and about 60 cm between rows. Early varieties can be planted somewhat denser.
Dutch technology
Growing potatoes using the Dutch method allows for a good harvest all year round. The main focus is on soil aeration, which means frequent loosening. When planting, leave sufficient space between rows. This allows for a yield of up to 2 kg of select potatoes from each plant, which will store and transport well. Only high-quality potatoes should be used. of growing potatoes")
Grain crops are good precursors. Fertile, nutritious soil should be used. Herbicide and chemical treatments are recommended for disease prevention. Soil cultivation is required in spring and fall.
Soil preparation involves autumn plowing. Organic matter, potassium salt, superphosphate, and rotted manure are then added. During spring plowing, nitrogen components should be added to the soil. Urea is suitable. It is recommended to till the soil to a depth of up to 27 cm. A disc cultivator is best. Before planting, it is customary to cultivate the soil with a rotary tiller or rotary tiller. This technique serves multiple functions simultaneously, loosening, crushing, digging in, and leveling the soil. A pitchfork with a 6-point tine width and a spacing of approximately 30 mm can be used.
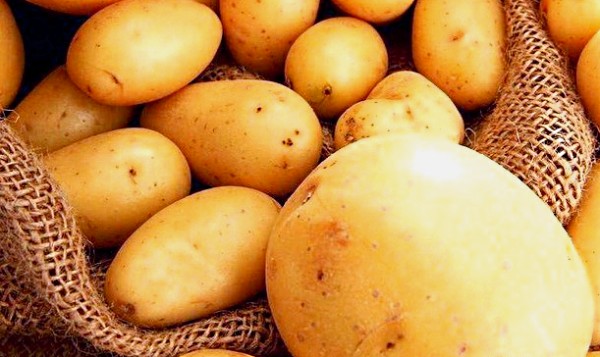
For planting, select evenly shaped tubers with a diameter of approximately 50 mm. There should be no break between soil preparation and planting. Soil readiness is easy to test. To do this, squeeze a small amount of soil in your fist and toss it. If the clump crumbles, you're ready to plant. Add a handful of wood ash to the holes. Experienced gardeners also add onion peels to repel pests.
Planting is carried out with a distance of 70 cm between crops. One hundred square meters (100 square meters) can accommodate between 500 and 1,000 tubers. If an early variety is chosen, a plot of 100 square meters (100 square meters) will accommodate no more than 600 to 700 tubers.
When cultivating potato crops using Dutch potato growing techniques, a few weeks after planting, the spaces between rows should be cultivated. This method of cultivating potatoes eliminates weeds and allows the tubers to grow and develop normally. A rotary cultivator is used for cultivating the fields. The first cultivation of the crops in the field is done using harrowing. This should be done a few days after watering.
To form ridges, use a shovel, hoe, or hand hiller. If the area has uneven areas, it's usually smoothed out using microrelief in the fall. It's recommended to water the plants three times per season. This should be done before flowering, 10 days after flowering, and after flowering. Spraying the crop against Colorado potato beetles is also necessary.
Preparing tubers
For planting, select potatoes that are free of damage and disease, about the size of a chicken egg. They are left in diffused light for three weeks at a temperature of 12 degrees Celsius (55 degrees Fahrenheit). This is necessary for the tubers to turn green. Then, they are sorted again and stored. The temperature should be maintained at 3 to 4 degrees Celsius (3 to 4 degrees Fahrenheit).
A month before planting, the tubers are washed and then heated at a temperature of approximately 24°C (75°F) for 2-3 days. For disinfection, it's a good idea to soak them in a boric acid solution. There are many germination methods, but the simplest is to sprout them in the light. The ideal temperature is 18-20°C (64-68°F) for the first 10 days and around 15°C (59°F) thereafter. After a month, the sprouts can reach about 2 cm in length.
Growing methods
There are quite a variety of methods for growing potatoes.
When growing potatoes under straw, the tubers are usually planted slightly deeper in the soil and covered with a layer of straw up to 20 cm thick. This can be further covered with plastic film. A second layer of straw is applied after the seedlings emerge and the stems reach a height of 20 cm.
The Dutch method involves planting the tuber at least 5 cm deep. The distance between ridges is typically up to 100 cm, and between bushes – 30 cm. The method was discussed in more detail above.
Using the Gülich method, divide the plot into 1-by-1-meter squares. Plant the tubers in each square, eyes facing down. After the shoots emerge, add soil to the center of the plant. When the first leaves appear, add more soil, then more. This allows the plant to develop into a strong, healthy plant. With proper watering and loosening, the yield can be around 15 kg per plant.
Not all beginning gardeners are familiar with the following method. Growing your favorite vegetables in barrels is not only interesting but also a great way to save space in your garden. Remove the bottom of the barrel and make holes in the sides for air and drainage. Place a layer of compost and soil on the bottom, typically about 10 cm thick. Place the tubers on top, then layer more compost and soil, and so on until you reach the top of the barrel. Water the contents and apply a complete fertilizer. Each barrel yields approximately one bag of selected fruit.
The vegetable container is a trench. It is 30 cm deep and 1 meter wide. The bottom is earthen, and the sides should be lined with brick or boards. Sawdust, straw, and grass should be placed on the bottom, on top of the tubers. Next comes a layer of manure and soil. The distance between the containers should be 60 to 80 cm.
As many seasoned gardeners have shown, it's possible to grow high-quality potatoes in bags. This method is somewhat similar to growing in barrels. Drainage and tubers are added, and once shoots emerge, compost and soil are added. Soil is added as the tops grow. Regular watering is also required.
Video: Potato Care
From the video you will learn how to care for potatoes.