How to Grow a Good Potato Crop: Proven Methods
Content
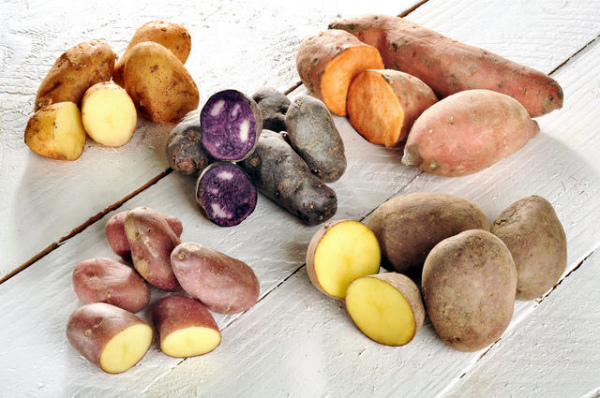
Selection and purchase of varietal tubers
Growing potatoes begins with selecting planting material. It's important to select only the most productive varieties suitable for your region, as they are the ones that can resist diseases and produce a harvest in the conditions typical for a given area. It's recommended to plant several potato varieties with different ripening times in one plot. Early root vegetables can be eaten in the summer, mid-season varieties in the fall, and late varieties can be stored for the winter.
Choose only high-quality and healthy tubers for planting. There should be no damage, let alone signs of disease, as even a single root can infect the entire bed. If you plan to purchase planting material, do so from a reputable nursery or at agricultural exhibitions. These facilities typically test the quality of the potatoes, which can go a long way toward avoiding purchasing poor-quality or infected tubers.
Video "Varieties"
This video will tell you about different potato varieties and how to choose them correctly.
Preparing tubers for planting
Before planting, potato tubers need to be "awakened." When kept in a cool place (cellar or basement), they enter a dormant state, which can only be awakened by warmth, sunlight, and stimulating solutions. Preparation of the tubers should begin 1-2 months before planting in the ground (in March-April), but if you plan to plant early in a greenhouse or under plastic, you can begin preparation as early as February.
After winter storage, the root vegetables should be sorted, removing any spoiled or damaged ones, and then sorting medium-sized potatoes from large ones. After sprouting, medium-sized tubers are planted whole, while large ones are best cut into pieces. Next, disinfect the planting material with a solution of potassium permanganate, boric acid, or ash. An ash infusion for sprouting potatoes is considered the most effective folk remedy. It not only disinfects the tubers but also promotes earlier germination and increases the plants' resistance to adverse environmental factors.
After treatment, the seedlings are laid out in a single layer in a bright room. They should not be exposed to direct sunlight, otherwise they will shrivel and dry out, but they should also be avoided in dim light, as this will result in weak and thin sprouts.
Once a week, the potatoes should be turned over and sprayed with water or ash. Until sprouts appear (3-4 weeks), it is recommended to keep the tubers warm, then reduce the temperature to 15-18°C or move them to a cooler location.
Within two months, the sprouts typically reach a length of 4-5 cm. If the soil hasn't warmed up by this time, the tubers can be brought into the cold zone. Planting in open ground is best done in mid-May; earlier, only under plastic cover. If you're cutting large tubers, the cut areas should be treated with disinfectant—this should be done on the day of planting.
Soil preparation
Many gardeners prepare their potato beds in the fall, and this has many advantages. In the fall, when plowing or digging, you can add manure, green manure, and other fertilizers that require time to decompose. However, in the spring, you should apply already-rotted manure, and only in small quantities; otherwise, the tubers will grow tasteless and contain nitrates. Another significant advantage is that by preparing the bed in the fall, you only need to loosen the top layer of soil in the spring.
Growing potatoes requires fertile sandy loam, loamy soil, or loose black soil. Avoid planting root vegetables in acidic soil, as this will lead to disease and reduced yields. If your soil is too acidic, you can correct it by adding lime or dolomite. For planting potatoes, it is recommended to build a raised bed (up to 30 cm) or raised beds. If soil preparation is carried out in the fall, after arranging and fertilizing, the raised bed should be covered with plastic and left there for the winter.
Potatoes should be grown in a sunny, level location. Avoid planting on slopes or in lowlands. Crop rotation is recommended, rotating the beds annually. Returning the crop to its previous location should only be done after 3-4 years. Good predecessors for potatoes include cucumbers, cabbage, beets, and salad greens. If following all the rules of crop rotation is not possible, try not to plant root vegetables in the same spot two years in a row.
Landing
Plant tubers in well-warmed soil (10-15°C). According to folk wisdom, potatoes should be planted in unprotected soil no earlier than after the bird cherry blossoms and birch trees have sprouted—usually mid-May. However, if you're aiming for two potato harvests per season, planting should begin in April, after warming the soil under plastic. Before planting the tubers, it's recommended to thoroughly loosen the bed.
Various technologies are used for planting potatoes: in holes, furrows, on ridges, under straw or hay, and also under film. Every vegetable grower can choose the most suitable method based on their soil, climate, and personal preferences. For example, if your plot has a low groundwater table, it's best to plant on raised beds 15-30 cm above ground level, or in a raised bed up to 30 cm. If the groundwater table is lower than 1.5 m, tubers can be planted in pits, shallow furrows, or trenches. It's best to space the pits or rows evenly. To ensure a level and attractive bed, it's recommended to dig the first row under a taut rope.
It has now become fashionable to use unconventional methods of planting potatoes, allowing for higher yields:
- In hay. This method involves preparing the bed in the fall and planting the tubers in the spring. Shortly before the cold weather sets in, trenches up to 30 cm deep are dug in the soil (no need to dig). A layer of hay is placed at the bottom of each trench and lightly tamped down. In the spring, tubers are planted in this hay and covered with soil (or humus). Over the winter, the hay rots and turns into a highly nutritious substrate. Furthermore, this type of bed can be watered less frequently, as rotted hay retains moisture well.
- Under film. The area is dug, fertilized, leveled, and covered with a thick black film. The tubers are planted in cross-shaped incisions directly on the surface of the film. This method results in more root crops, eliminates the need for hilling and disease control, and reduces the need for watering.
- Under straw. With this method, the tubers are spread on the soil surface, moistened, and simply covered with a 15 cm layer of straw. This bed doesn't require hilling, weeds don't grow in it, and the root vegetables grow large.

For those interested in how to get a double potato harvest, it's important to know that the process is extremely simple. The first (last year's) tubers are planted under plastic in early spring—this allows the potatoes to produce a crop by the end of June. When digging up the harvest, select only the large root vegetables, leaving the smaller ones behind, being careful not to damage the root system—these will form the second crop. If the first crop ripens by the end of June, the second can be harvested in September.
Further care
With the emergence of the first shoots, the busy season begins for gardeners. Weeds appear along with the potatoes, and since they grow faster than potatoes, weeding and loosening the soil should be done at least once a week, as well as after each rain. To prevent a crust from forming on the surface, it is recommended to cover the spaces between the rows with mulch.
When the bushes reach a height of 10-15 cm, they need to be hilled. The need for this procedure depends on the method of growing potatoes. If the bed is covered with straw or plastic, hilling is not necessary. In other cases, adding soil to the bushes will greatly benefit the plants, and you can also apply fertilizer during hilling.
What and how often should I feed potatoes? This is a pressing question for many gardeners. In good, fertile soil, enriched with organic matter before planting, root vegetables thrive without additional feeding. However, poor soil, even with fertilizer, quickly becomes depleted, and the plants may not receive enough nutrition. Therefore, it's advisable to fertilize the plants at least three times during the season.
Organic or combined solutions can be used for fertilizing. Potatoes will grow better if watered with a weak (1:15) solution of mullein or potassium permanganate during flowering. Ash is very beneficial for potatoes. It can be scattered between rows or used for root feeding. As a source of potassium, ash improves the flavor of root vegetables and also protects against many diseases. A very effective potato fertilizer is "green infusion."
Potatoes don't require regular watering; their tubers contain sufficient moisture, and the soil at the root depths rarely dries out. However, during periods of unusually hot weather, as well as when the roots are gaining weight, it's recommended to moisten the bed. If the planting area is small, you can water each plant at the base, combining watering with fertilizing.
Diseases and pests
If the tubers are disinfected before planting and the soil is free of contamination, the crop is rarely affected by disease. During periods of prolonged rainfall, potatoes can be threatened by fungal diseases, including root rot. The most dangerous for potatoes is late blight, which develops in hot and rainy summers. It attacks the leaves of plants, delaying tuber development. Spores of this fungus are easily spread by insects and wind, so if your neighbors have late blight, you won't be able to avoid it either.
Potato roots are sometimes affected by scab. This unpleasant disease manifests itself as dark spots and growths on the tubers. It can be caused by overheating of the soil or, conversely, a sudden drop in temperature. Treating the tubers with boric acid (1.5%) before planting and fertilizing the plants with calcium can help prevent the disease. Copper-containing products, such as Hom, Oxyhom, and copper sulfate, are effective against fungal diseases on the above-ground portions of the plants.
The most common and damaging pests are the Colorado potato beetle and the mole cricket. The beetle primarily infests the green parts of plants, while the mole cricket damages root crops. Many chemical and folk remedies are known for treating the Colorado potato beetle. Among the most well-known and effective are Decis, Confidor, Sonet, Intavir, Aktara, Mospilan, and Colorado. Folk remedies for treating potatoes include infusions of wormwood, garlic, tobacco, and celandine.
Harvesting and storage
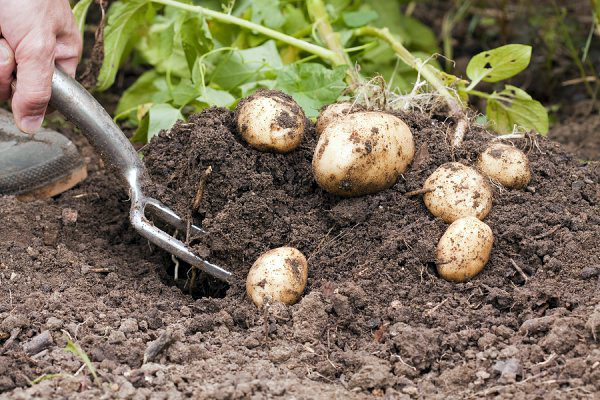
The potato harvesting time depends on the variety and the region's climate. Early varieties are dug up in late July, and for the first harvest, the roots are harvested as early as June. Mid-season potato varieties reach maturity by mid-August, while late varieties are recommended to be dug up no earlier than September.
Shortly before harvesting potatoes, a number of preparatory steps should be taken: remove all weeds, trim the tops to a height of 7-10 cm (this will make it easier to lift the roots from the ground), and remove plant debris from the plot. Potatoes are best harvested in dry, but not excessively hot, weather. After digging, it's recommended to spread the tubers out in the garden bed to dry, then remove the soil and move them to a sheltered area.
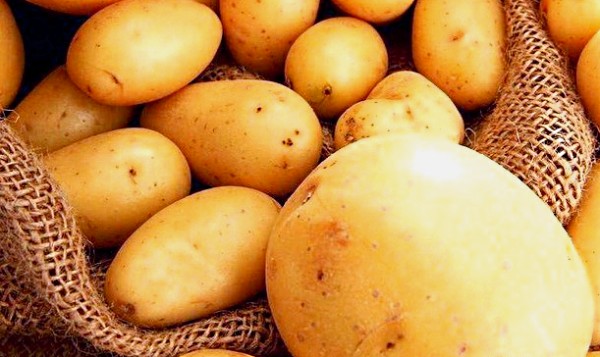
Before storing the root vegetables in a cellar or basement for the winter, they should be kept in a dry place for two weeks—this will give any potential diseases time to develop. Then, sort through all the potatoes, removing any damaged or spoiled ones. You can immediately separate the root vegetables by variety and select tubers for planting next year.
In a cool place (not above 0°C), root vegetables can be stored until spring without losing their marketability or flavor. The storage area should be dark, otherwise the tubers will sprout. A cellar is ideal for storage. If you must store them in a basement with windows, you can cover the tubers with sand. To ensure the potato bed remains full, sow it with green manure. Late August to early September is the best time to do this.
Video "Illness and Struggle"
This video will teach you how to combat potato diseases.