How to plant potatoes correctly to get a good harvest?
Content
Prepare the seeds in advance
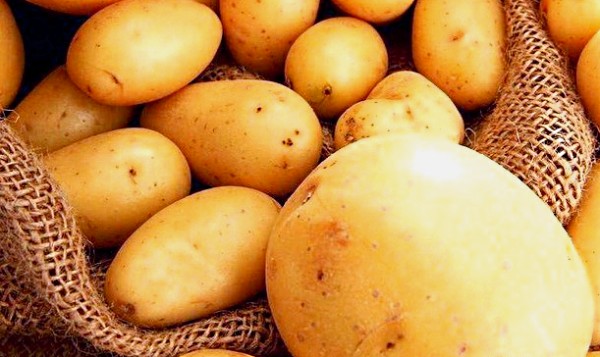
The most important aspect of potato growing is choosing the right seed. The success of the harvest depends on how well the seeds are selected and prepared. Even with proper care, it's difficult to get excellent root vegetables from poor-quality seeds.
Preparing seeds for planting should begin in the fall, when the harvest is underway. Seed preparation is carried out as follows:
- First, the vegetables need to be sorted. Smaller root vegetables should be selected for planting, while larger ones are left for eating;
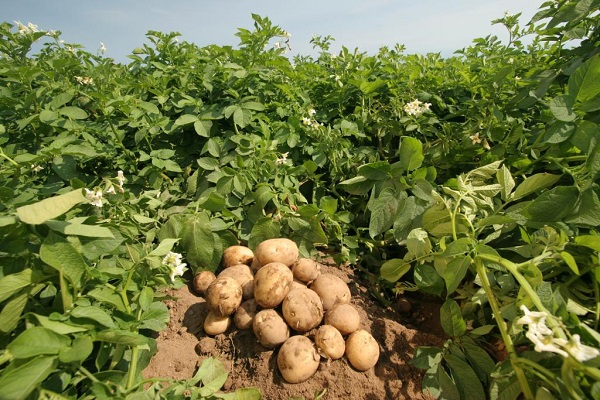
- you should select seeds from those bushes that have produced the maximum amount of potatoes;
- The optimal size of tubers for sowing should be 4-5 cm. This size is equivalent to a chicken egg. Slightly larger tubers are acceptable. They will ripen slightly earlier and also produce a slightly larger yield.
- Very large potatoes can also be used as seed. It's worth noting that some varieties will produce many small roots in this case. However, this will result in significant waste.
You may find information about using potatoes cut into several pieces as planting material. This is possible, but only if there is a shortage of small-diameter seeds.
To get a good harvest from tuber pieces, they should be dried in the sun before planting. The weather should be warm and dry.
In addition, potato parts should be sprinkled with ash. Remember that such planting material can spoil during a rainy spring. This is because the skinless surface is more susceptible to the negative effects of pathogens (viruses, fungi). As a result, such seeds will rot during the spring.
It's important to remember that when planting cut potatoes, the weather must be dry and warm. If it rains, there's a risk that the cut tubers will simply rot in the ground, producing no harvest or weak seedlings.
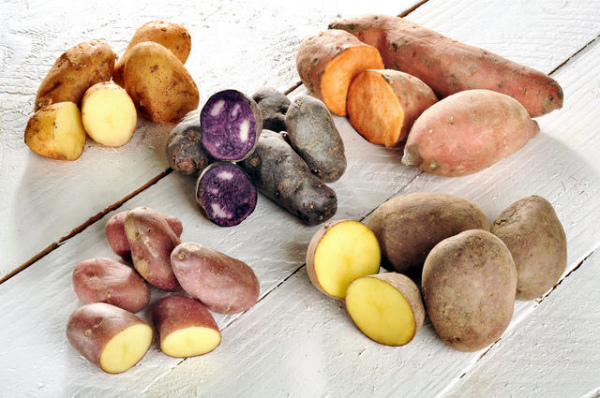
Planting material can be purchased at specialty stores or retail outlets. In this case, it's not recommended to choose super-elite varieties. These varieties will only produce excellent yields if all agricultural practices are followed correctly. Moreover, the most productive varieties are the elite ones.
When buying seeds at the store, be sure to ask the seller for a quality certificate. This document should always accompany the potato variety. Without a quality certificate, you risk purchasing contaminated planting material. This will result in a poor harvest. You'll also need to disinfect the soil to eliminate diseases and pests.
Some gardeners claim that sprouted seed eyes can be used as planting material.
Video: Growing from Seeds
This video will show you how to grow potatoes from seeds.
Before landing
Before planting, properly prepared planting material must be "awakened." This procedure involves greening the tubers before planting. To achieve this, the roots are placed in a bright location. For example, they can be placed in the shade of trees or under various types of canopies.
This procedure will cause the seeds to produce the poison solanine. This will allow the potato tubers to be stored for much longer.
When greening root vegetables, avoid exposing them to direct sunlight. This will cause them to become overloaded with poison, making them dangerous to eat.
After this, you can begin sprouting the potatoes. This should be done approximately a month (some sources say 20 days) before planting. The sprouting process follows this schedule:
- First, they must be washed in a weak solution of potassium permanganate;
- After this, the planting material should be laid out in one layer (maximum two layers) in containers. Wooden boxes can be used for this purpose;
- The containers must be placed in a bright room where the air temperature is at 20–22ABOUTC. The boxes should be placed in such a way that they are not exposed to direct sunlight;
- in such a room the boxes should stand for 2-3 weeks;
- then they are transferred to a cooler room with a temperature of about 10-14ABOUTC. A glazed balcony is perfect for these purposes.
Some gardeners claim that sprouting potatoes should begin in the dark. However, this results in weak, long sprouts that can be easily damaged or even broken off during planting. To ensure a good harvest, sprouting should be done in a bright room. This will result in strong, green sprouts that are not too long (no more than 1-1.5 cm).
When sprouting potatoes, they need to be kept moist. To do this, periodically turn the tubers over and spray them with water. Spraying should be done every other day. Experts recommend alternating between regular water, a mineral fertilizer solution, and an ash solution. This rotation minimizes the risk of pathogenic microflora developing on the tubers and also stimulates their germination. Remember to prepare spray solutions immediately before use.
A greenhouse is an excellent place for sprouting potato tubers. The seedlings should be laid out on a straw mat and covered with plastic film. This will create the necessary conditions for rapid and high-quality germination: sufficient moisture and warmth.
Preparing the site
Before growing this crop in your garden, you need to know not only how to plant potatoes, but also what location will be optimal for them.
Potatoes thrive in sandy loam and medium to light loamy soils. They will also thrive in forest soils and dried peat soils. However, acidic and heavy soils are not the best choice for potatoes. In these cases, amending the soil with manure will improve its properties.
When choosing a plot for this vegetable crop, it's essential to consider crop rotation. Potatoes should only be planted in the same spot after three years. The following vegetables make excellent predecessors:
- beet;
- cabbage;
- leafy vegetables;
- carrot.
At the same time, it's important to prepare the soil itself. This will improve future yields. To do this, add fertilizer to the soil. Typically, the first application is in the fall, after all the crops have been harvested and the vegetation has been cleared. The best way to fertilize the soil is by adding natural fertilizers, especially compost.
To prepare the soil for planting potatoes, add 10 liters of well-rotted manure per square meter. Approximately 50 grams of potassium-phosphorus fertilizer can be added during digging.
It's worth noting that in acidic soils, liming is essential to ensure excellent fruiting. To do this, add 400-500 grams of dolomite flour or lime per square meter.
If fertilizer wasn't applied to the soil in the fall, this procedure can be performed immediately before planting. This will be part of the site preparation process.
Thus, preparing a place for planting potatoes is carried out according to the following scheme:
- First, in the fall, the land is cleared of plant debris. To prevent the risk of spreading infection, all collected vegetation must be burned;
- After this, organic matter is added to the soil. It is recommended to add 3-4 kg of manure per square meter. In late summer or early fall, fertilizer is added to the soil under the potato beds: 13 g of ammonium nitrate should be added per square meter. This can be replaced with 10-13 g of potassium salt (30-40%), 10-15 g of double granulated superphosphate, or 10 g of urea;
- Next, you need to dig the soil deeply. This will fertilize it well and prepare it for planting. Don't break up any large clods of soil during digging. They will wash away naturally during snowmelt and rain, making the soil fluffy and soft.
- In the spring, it is recommended to apply complex nitrogen, phosphorus, and potassium fertilizers to the soil. At the same time, the soil must be re-dug and loosened. At this time, digging should be done to a depth of 10 cm.

Please note that special attention should be paid to low-lying areas when preparing the planting site. Low-lying areas should be provided with drainage to allow excess water to drain away.
But it is also important to remember that preparation of the planting site should be carried out immediately before planting the planting material:
- beds and holes are formed in the selected place;
- Fertilizer should be added to the bottom of each hole to enrich the soil with essential micronutrients and to protect root crops from pests. To increase yield, it is recommended to add a handful of wood ash and compost to the holes. Any other fertilizers can be added.
- In addition to fertilizer, you can place onion peels at the bottom of the holes. Their smell will repel pests such as earwigs, wireworms, and mole crickets from your plantings;
- After adding all the ingredients into the well, they need to be mixed well.
It's worth noting that some gardeners recommend planting black beans in the holes. However, in practice, such manipulations don't always produce clear and positive results. Therefore, few people know or use this method.
Once the planting material is prepared and the location is chosen correctly, you can begin planting the seeds in the holes. However, choosing the right time is crucial.
When to plant
One of the most important aspects of growing potatoes is choosing the right planting time. Even if all preparations have been completed correctly, choosing the wrong planting time can ruin all your efforts.
It's worth noting that planting timing directly depends on both the potato variety and local weather conditions. Don't rush. It's best to wait until the weather has settled in and the soil has warmed up. But don't wait too long, as the soil shouldn't dry out too much. Here, as always, a happy medium is needed. According to folk wisdom, tubers should be planted when small leaves appear on birch and poplar trees.
Professional gardeners say the ideal time for planting is when the soil at a depth of 10 cm has warmed to 10 degrees Celsius. At night, the temperature should also not drop below 10 degrees Celsius.OWITH.
You may find information that planting tubers occurs after strong sprouts have formed on them and the soil has warmed up to 6OS. Although potato growers may dispute this assertion. In this case, the planted tuber will not always sprout.
Planting technology
To plant potatoes correctly and get a good harvest, it's essential to adhere to a specific planting technique. The key to success in this situation is a properly chosen planting pattern, which should be 80x35 cm. This space between rows is sufficient for the plants to thrive. Planting too close together will result in the plants shading each other. This will also result in poor ventilation, which can lead to late blight. In this situation, proper hilling is out of the question.
Reducing the spacing between plants is only permissible in small plots or when growing early-ripening varieties on black soil. In this case, the bushes will form shorter, more vigorous foliage, which won't affect their yield. In this case, the spacing between rows can be 60 cm instead of 80 cm.
The spacing between adjacent plants can also vary. If the planting material consists of small tubers, the 35 cm spacing can be reduced to 20 cm. For early varieties, this parameter can be 26 cm (approximately one and a half spade-widths). Late varieties will produce a good yield with a spacing of 30 cm between tubers.
It is worth noting that when growing potatoes in heavy soils, tubers are planted at a distance of 45 cm from each other.
The planting depth of root crops is also important. The optimal depth is 7-10 cm. This depends on the soil characteristics and the size of the planting material:
- large tubers should be planted deeper;
- Small potatoes are planted closer to the surface.
- for light soils, a depth of 10 cm will be normal;
- For clayey and dense soils, the holes should be no more than 5 cm deep.
The tubers should be planted in the prepared holes with the sprouts facing down. The soil underneath should be loose. Once the potatoes are planted in the holes, they are covered with soil and leveled with a rake.
As we can see, growing potatoes is not that difficult.
Video: "Planting for a Good Harvest"
This video will show you how to plant potatoes and get an excellent harvest.